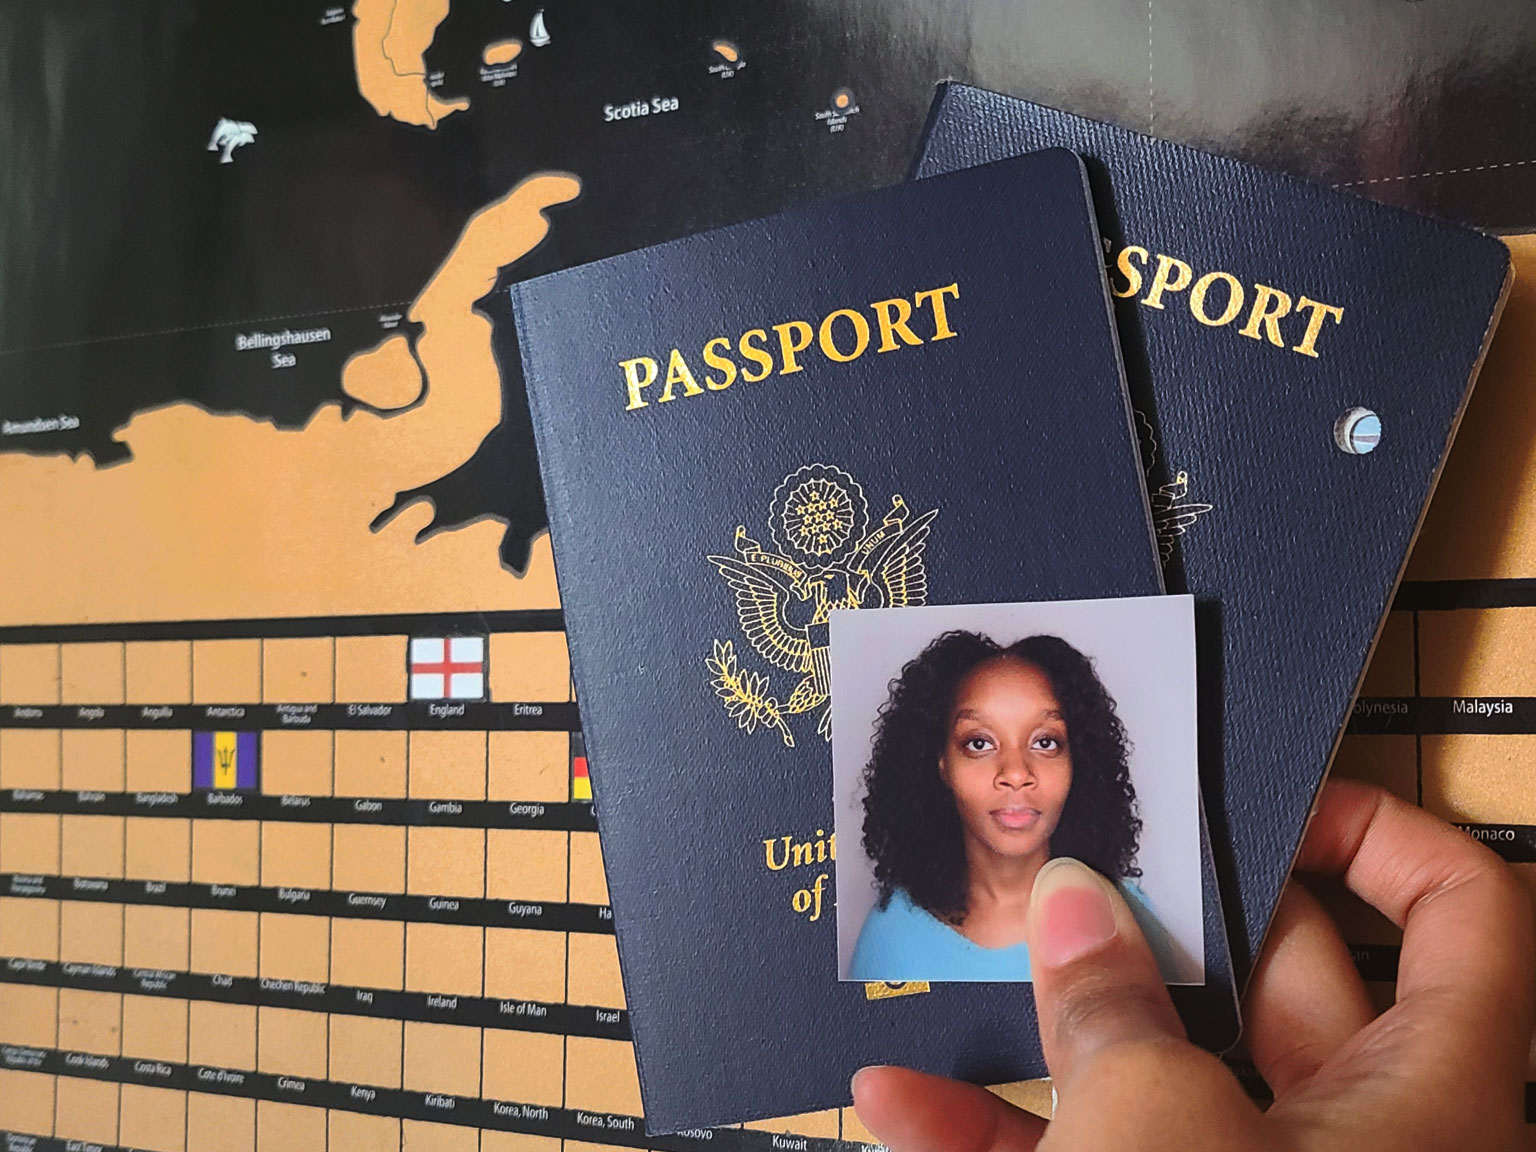
Did you know you can take your own passport photo? This can be the easiest, cheapest, most convenient, and safest option, especially during this pandemic.
My passport expired in February 2021, so in November 2020, I was excited to submit a better photo with my application. My last one was taken in high school at my local CVS and the experience was okay. But my hair was in a questionable state, and my eyebrows were horrendous. I was also wearing white, with a white backdrop — which was a terrible choice on my part.
So, I did some research on how to size and print my photo for my application. In January 2021, I received my new passport with a beautiful photo showing my curls (and better eyebrows). I wanted to share how you can take your own passport photo from the comfort of your home.
Passport photo requirements
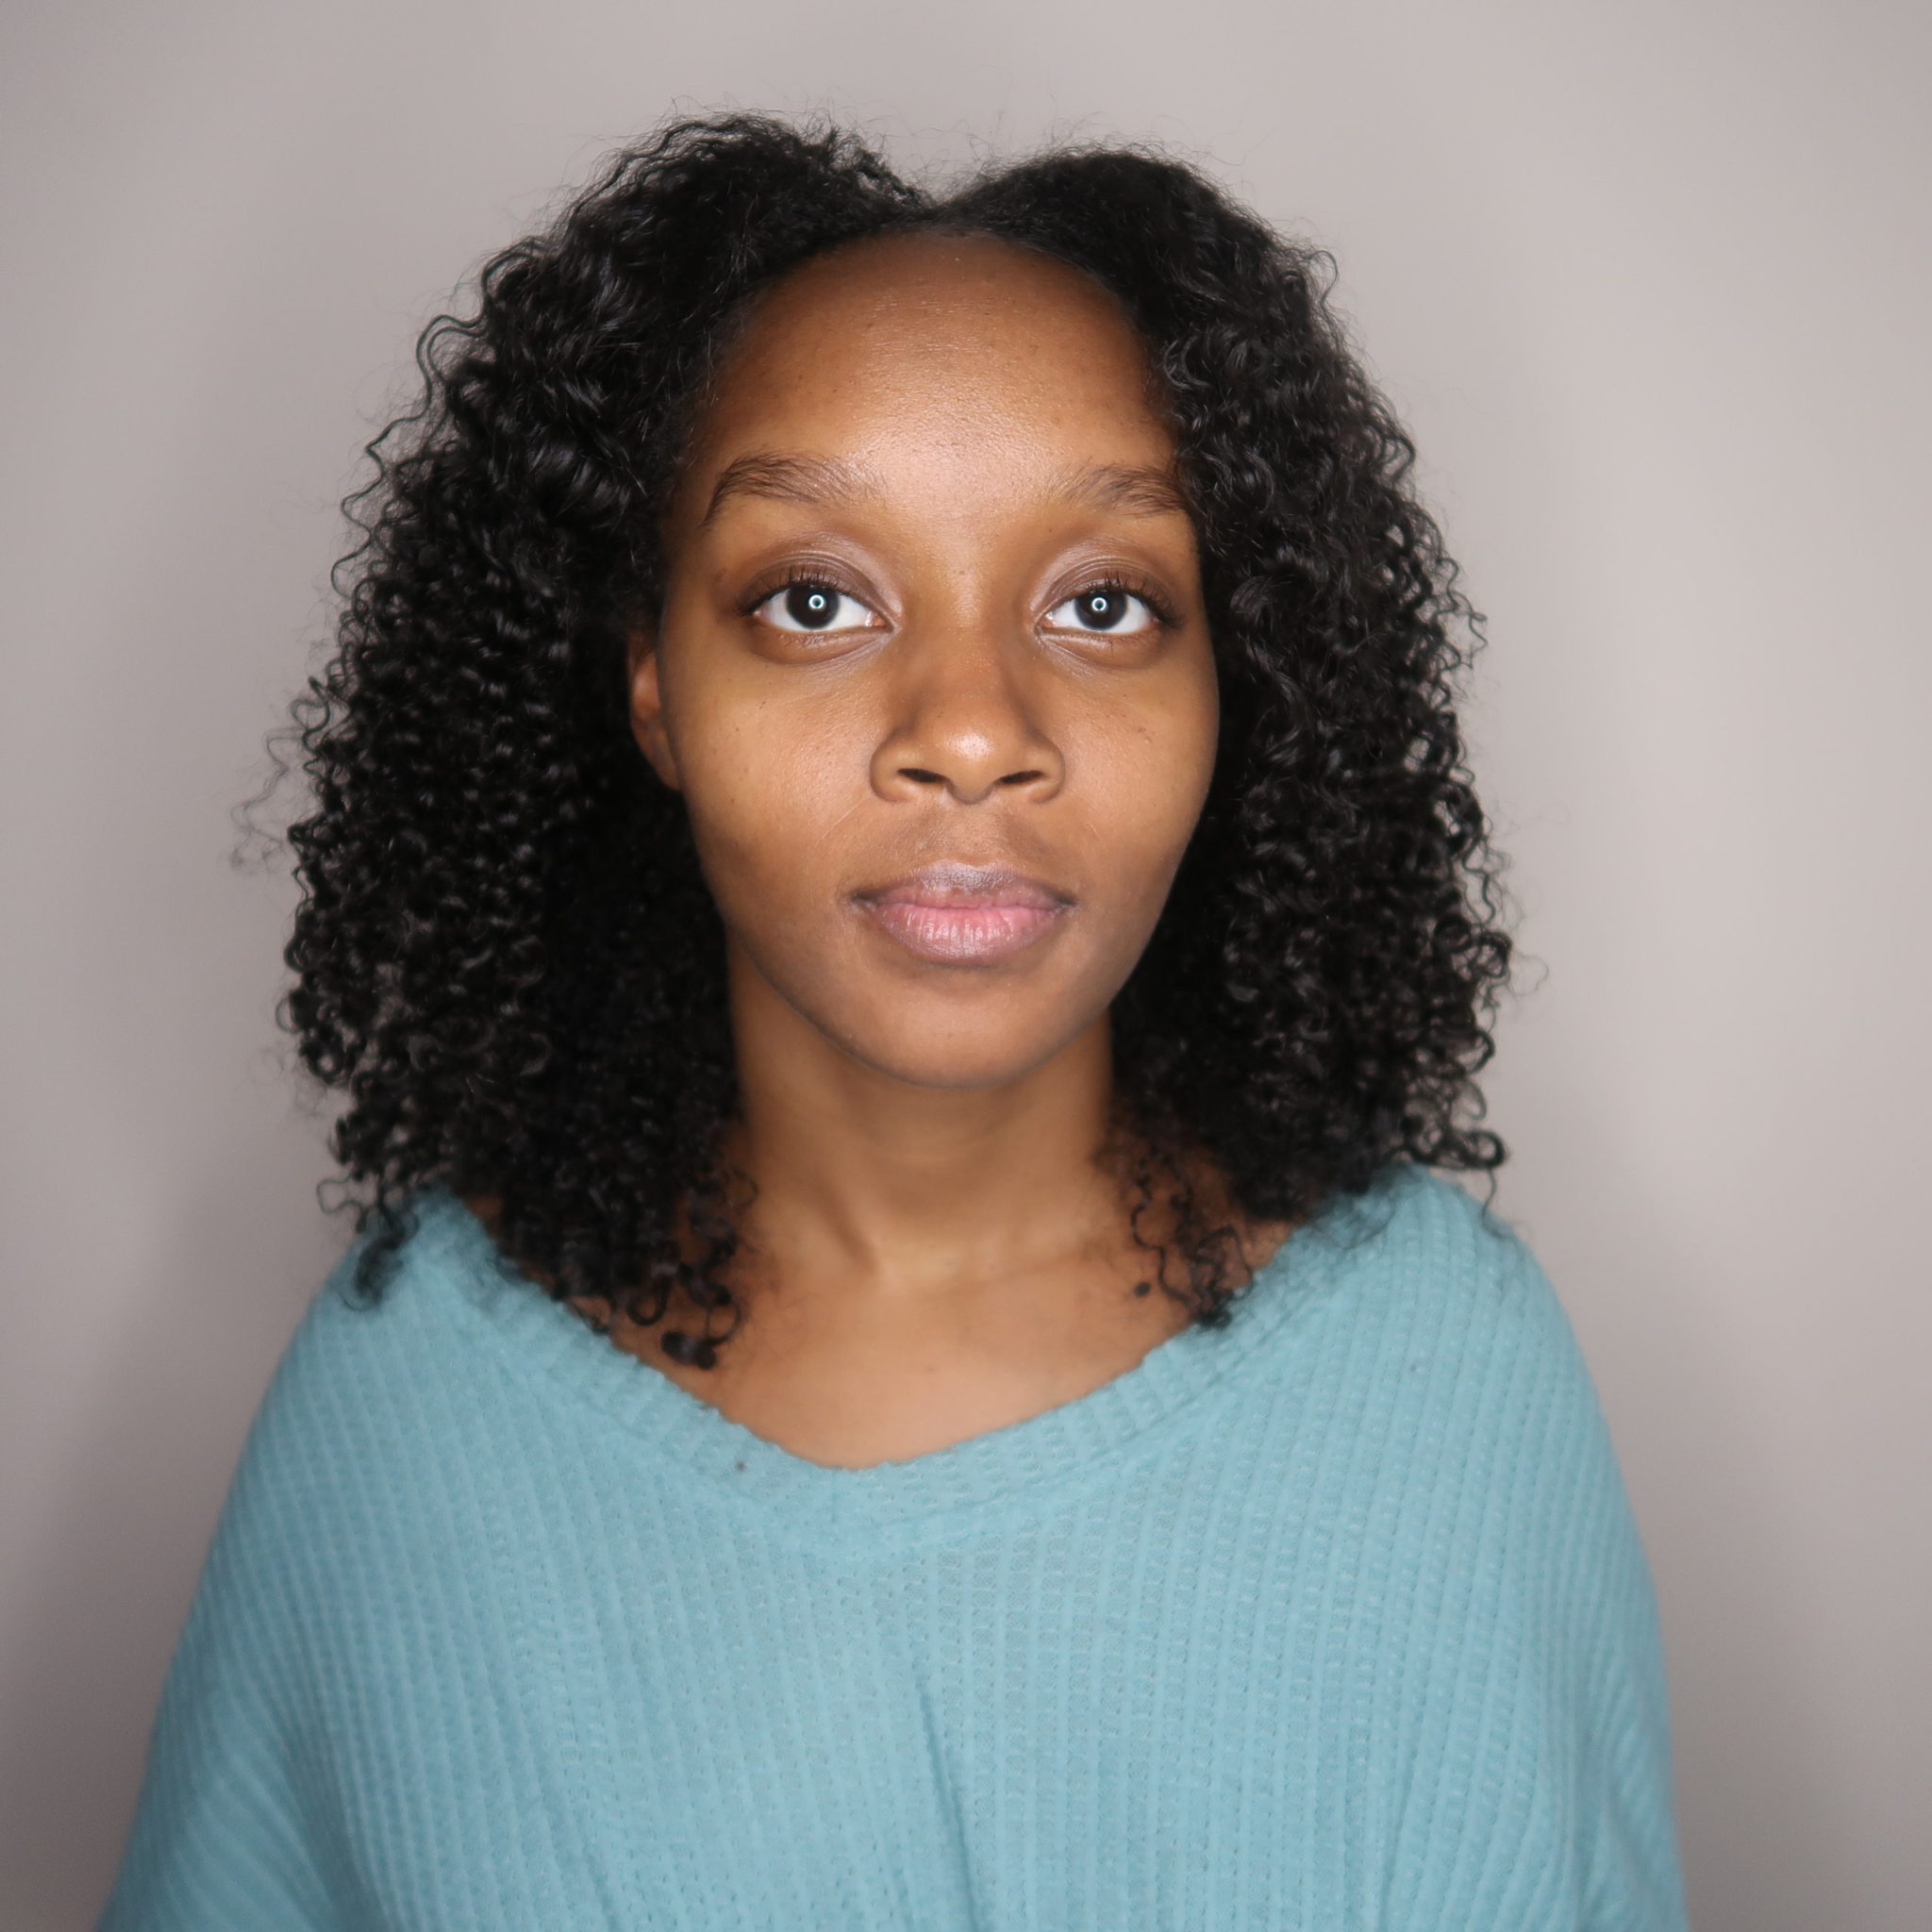
Make sure to follow the U.S. State Department’s requirements and look at the acceptable and unacceptable examples they share. This will help you see and understand how to pose, what to wear, and the overall photo quality.
- Submit a color photo, printed on matte or glossy photo quality paper, taken in the last six months.
- Use a clear image of your face, no filters or heavy shadows in the photo.
- Face the camera with your head centered in the frame and not tilted.
- No selfies.
- No eyeglasses, hat, or head covering (there are exceptions in this area).
- Use a plain white or off-white background.
- No uniforms, clothing that looks like a uniform, or camouflage attire.
- If you smile, it must be natural and unexaggerated — both of your eyes must be open.
- Photo size should be 2×2 inches with your head centered and sized between 1 to 1.4 inches.
- Jewelry/piercings are acceptable as long as they don’t hide your face; tattoos are also acceptable.
How to Take Your Own Photo
In all honesty, you don’t need over-the-top equipment to snap a good passport photo. Below are the things you’ll need (I also underlined the specific items I used):
- A digital camera or smartphone camera
- Tripod or someone to snap your photo
- Good lighting (e.g. ring light, natural sunlight)
- White, off-white background
I actually used a photo I captured months prior for a Bask & Bloom collaboration. Since I take tons of photos for hair content, I knew I had to have one that met the requirements.
Tools to help you take, resize, and print your photo
Need assistance taking your photo, making sure it meets the requirements, or printing? Thanks to technology, there are tons of websites and apps to help:
- The U.S. State Department: Outside of the requirements listed, you can also utilize their free photo-cropping tool. It helps size your photo correctly so you can print it yourself. I used this tool when picking my photo, but as of December 31, 2020, it’s unavailable. However, they’re working to upgrade it.
- iVisa.com: This website does everything for those who want to take a passport photo at home. This includes printing and mailing your photos to your house. You can also pay extra to have your photos checked to make sure they’ll be approved.
- Passport Photo Booth (iOS | Android): One of the many apps out there that’ll help you take your passport photo. Passport Photo Booth helps with the photo composition, showing you exactly where to pose within the frame. You can email or save the image for free, or pay extra to have your photo printed.
- Target Passport Photo: Upload your photo using their easy-to-follow passport photo guidelines and Target will send copies to you.
- Walmart Passport Photo: The same concept as Target’s, you can also pick up your photo in 1 hour.
I ended up using Walmart to print my photos, but you can print your photos at home. I, however, didn’t have glossy or matte 2×2 inches of photo-quality paper for my printer.
